Recording the True Thermal History of an Overmolded Panel?
Have you ever preheated PEEK panels perfectly, only to watch the overmold separate during cooling? It's a frustrating problem. You follow the rules, but the bond still fails.
To get a strong, reliable bond, you must record the panel's temperature at two key moments: right as it leaves the oven and immediately before the overmolding tool closes. This data provides the true thermal history, making your process repeatable and based on evidence, not just a polymer name.
I've seen this issue many times. A team carefully sets the preheating oven according to the PEEK datasheet, but the results are inconsistent. The missing piece of the puzzle isn't in the oven; it's what happens between the oven and the mold. By capturing the real temperature of the panel on its short journey, we can move from guesswork to a predictable process. This discussion is based on my practical experience, but you should always confirm any solution for your specific polymer grade and application. Let’s look at how to capture this critical data.
Recording Panel Temperature When It Leaves the Oven?
The oven display reads 220°C. But is your panel actually at that temperature? Relying only on the oven's setpoint can be a big mistake.
Use a non-contact infrared (IR) pyrometer to measure the panel's surface temperature the moment it comes out of the oven. This gives you your first reliable data point and confirms if the preheating stage was actually successful before the part starts to cool.
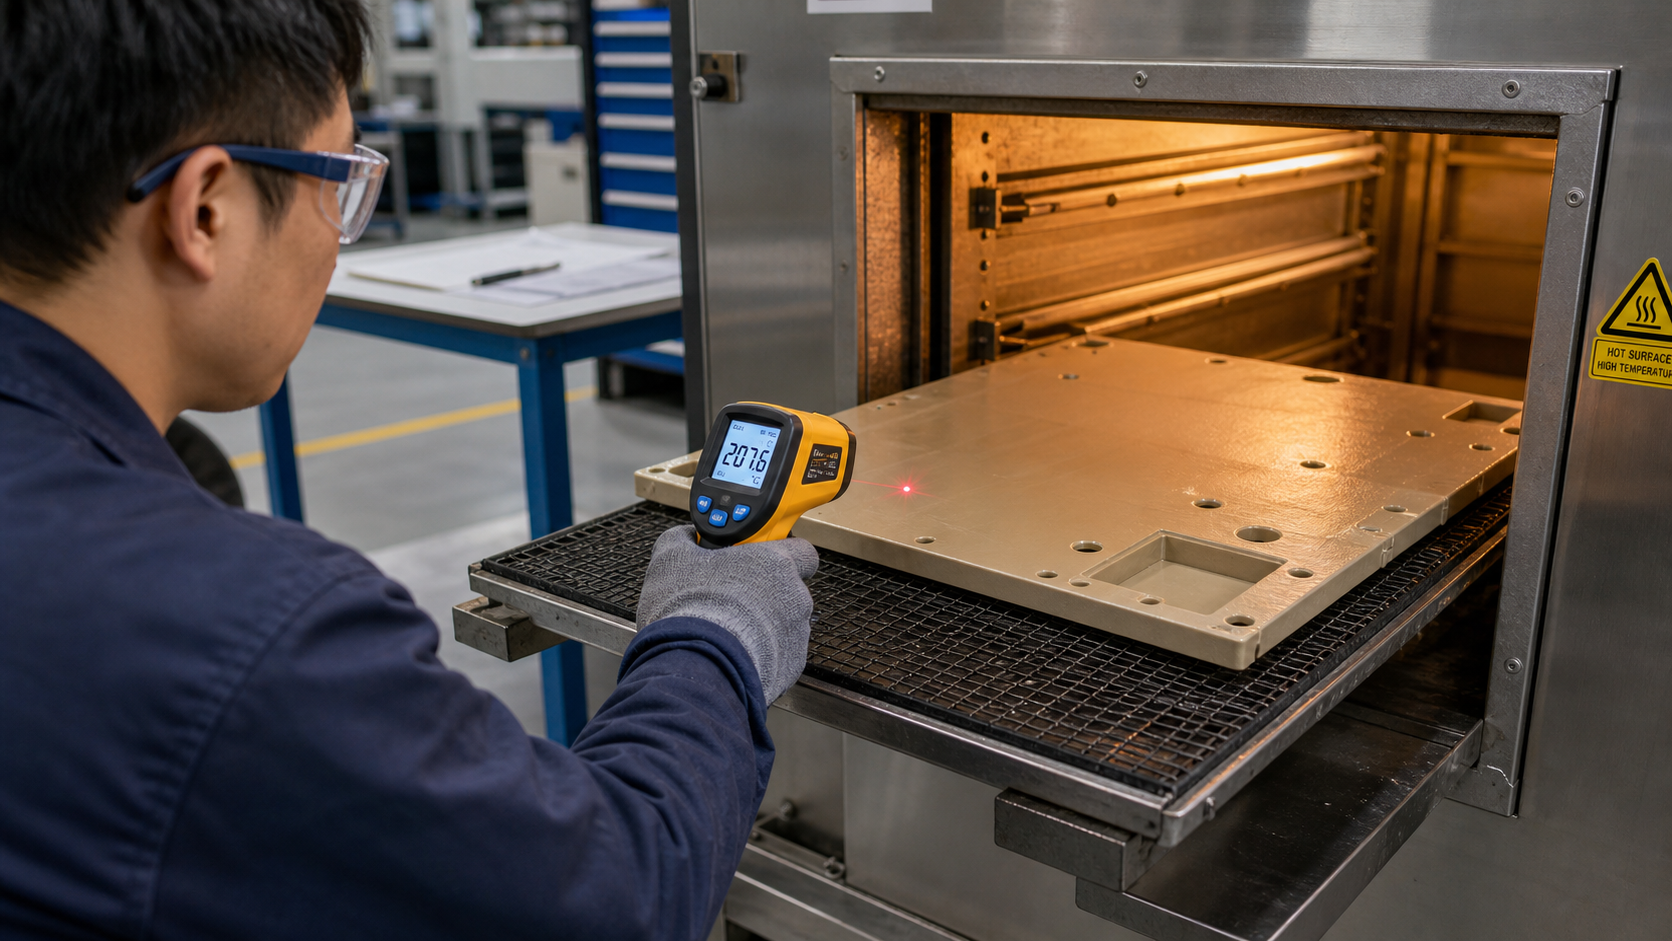
The temperature of the air inside an oven and the temperature of the panel itself are two different things. A panel needs time to absorb that heat, a process called "soaking." If the panel isn't in the oven long enough, or if it's in a cooler spot, it will never reach the target temperature. This is where direct measurement becomes so important. I've found it's the only way to be certain that your process has started correctly.
Why the Oven Setpoint Isn't Enough
Several factors can create a gap between the oven's setting and the panel's real temperature. The panel's thickness matters, as a thicker part needs more time to heat all the way through. The material grade is also a factor; a glass-filled PEEK grade might heat at a different rate than an unfilled grade. Even the panel's location inside the oven can cause temperature variations. To get a true reading, we need the right tool.
| Measurement Method | Pros | Cons |
|---|---|---|
| IR Pyrometer | Fast, non-contact, easy to use. | Measures a small spot; surface emissivity can affect accuracy. |
| Thermal Camera | Shows the full temperature profile of the panel. | More expensive; requires some training to interpret correctly. |
| Contact Probe | Very accurate at the point of contact. | Slow, can cool the surface it touches, may leave a mark. |
For most situations, a simple IR pyrometer is a great starting point. It gives you an instant, evidence-based confirmation that your panel is ready for the next step.
Measuring the Surface Immediately Before Overmolding?
Your panel was hot when it left the oven. But after a quick trip through the open air, is it still hot enough to form a permanent bond?
The most critical measurement is the panel's surface temperature just seconds before the mold closes and injection begins. This "tool entry" temperature directly determines the quality of the polymer-to-polymer fusion. Too much heat loss during transfer will lead to bond failure.
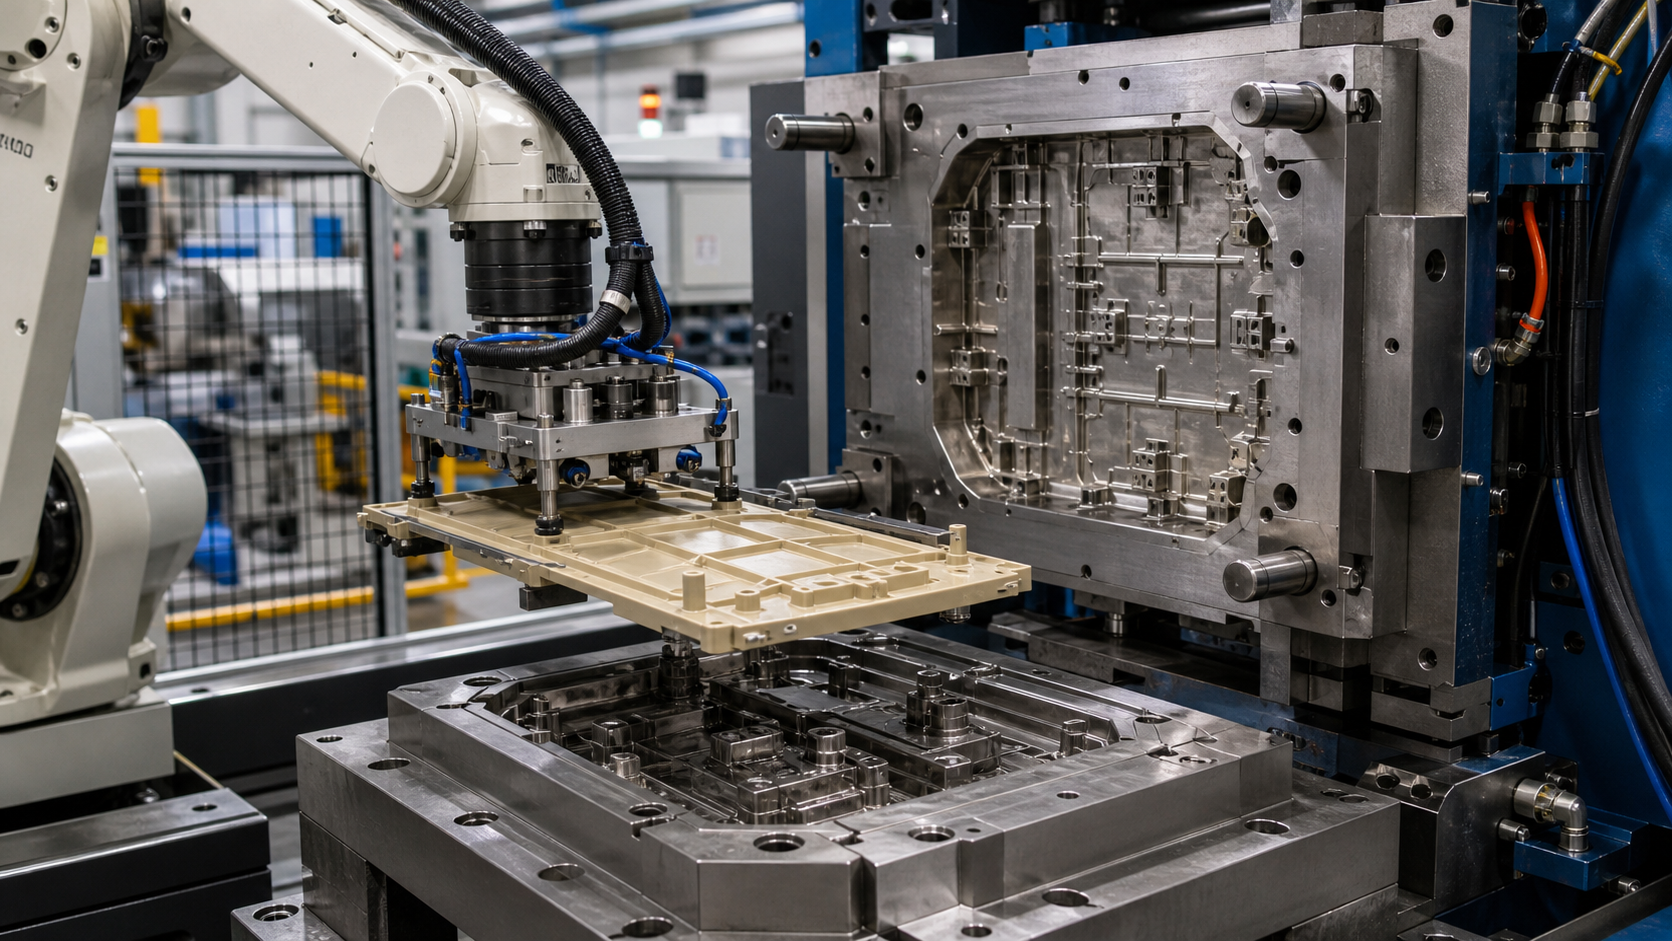
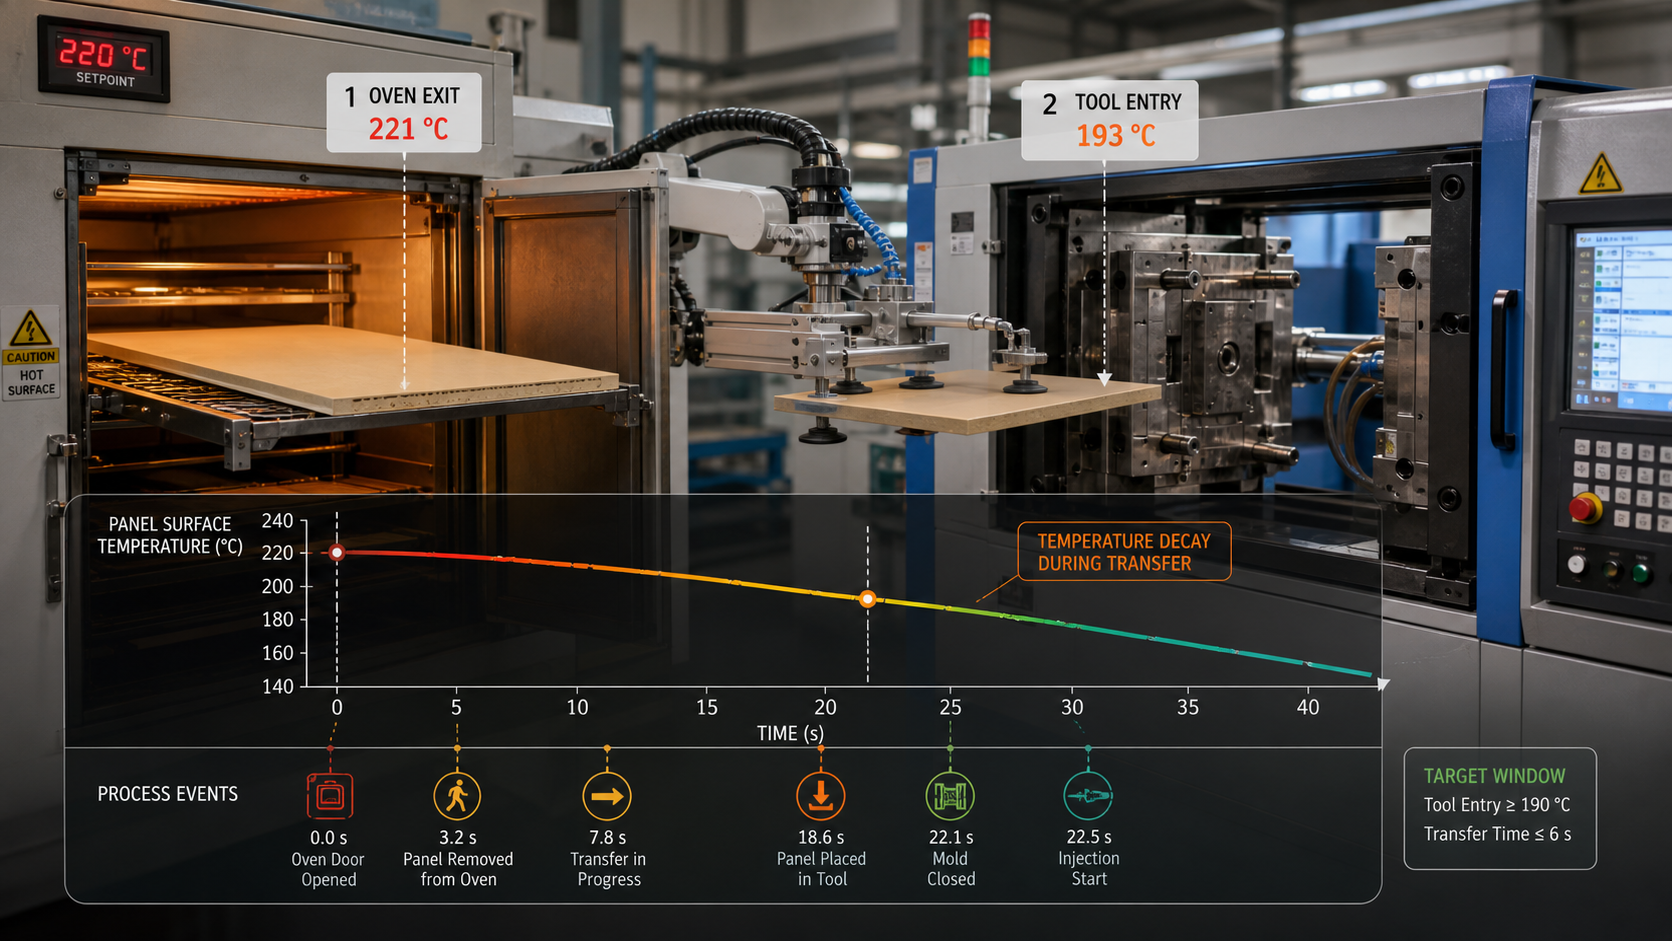
I worked on a project where we had random failures that we couldn't explain. The oven temperature was perfect, and the operator was consistent. We finally placed a sensor right at the mold and discovered the problem. The transfer time—the time it takes to move the panel from the oven to the mold—was the key variable. A few seconds of delay was enough to drop the temperature below the critical bonding window. This is especially true for materials like PEEK, where the surface needs to be molten enough to fuse with the incoming material. Even small things, like an open door creating a draft or a slightly longer reach for the operator, can cause a critical drop in temperature. This second measurement tells you what the polymer is experiencing at the moment of truth.
Synchronising Sensor Records With Handling Events?
You have two temperature readings. But a list of numbers is just data, not information. Without context, you can't see the full story.
You must synchronize your temperature records with key handling events. Create a simple timestamped log noting when the oven door opened, when the panel was placed in the tool, and when the mold closed. This connects your thermal data to real-world actions.
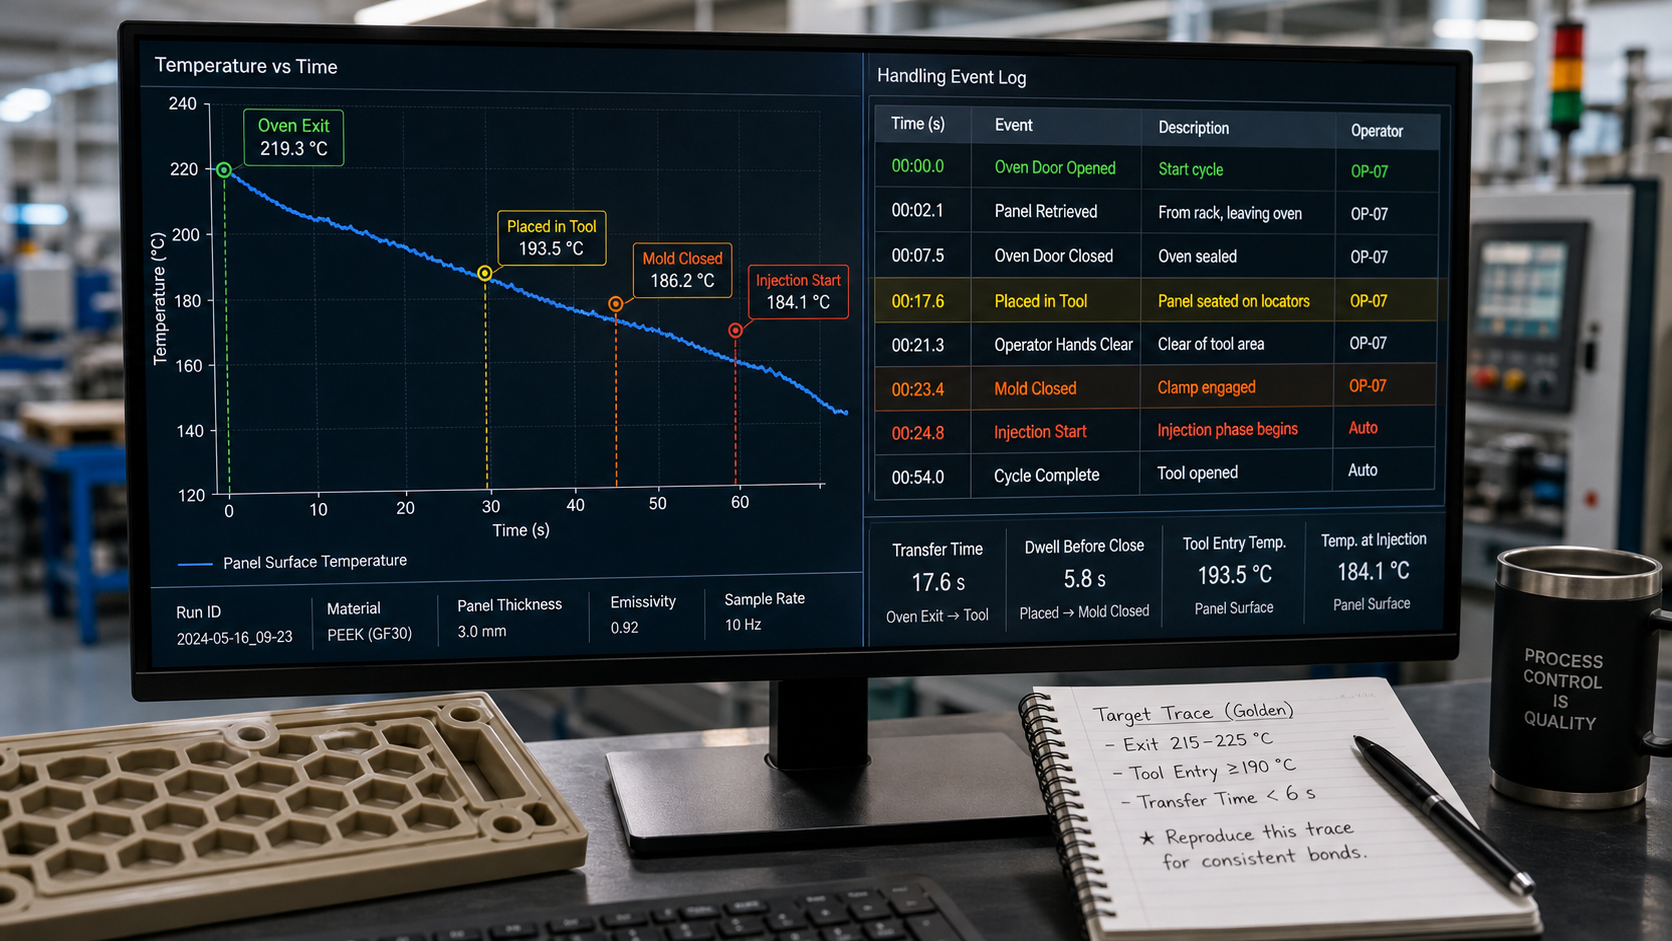
This step is what turns your measurements into a powerful diagnostic tool. By lining up the temperature curve with events, you can pinpoint exactly where things are going right or wrong. For example, your log might show that the panel's temperature drops 15°C every time the transfer takes more than seven seconds. Now you have a clear, actionable problem to solve: you need to make the transfer faster or better insulated. I once used a simple video camera alongside the temperature logger. We saw that one operator would pause for a second to adjust his grip. That tiny pause was enough to cause the part to cool too much. By synchronizing the video timestamp with the temperature log, the problem became obvious. This approach allows you to manage the entire process, not just isolated settings on a machine. It gives you the evidence needed to make meaningful improvements.
Using the Trace to Reproduce a Successful Bond?
You finally made a perfect part. The bond is strong, and it passed all the tests. How do you make sure you can repeat that success tomorrow, and the day after?
When you produce a perfectly bonded part, its complete thermal history becomes your "golden trace." This graph of temperature over time, marked with key events, is now your target. Reproducing this exact thermal signature is the secret to consistent, successful overmolding.
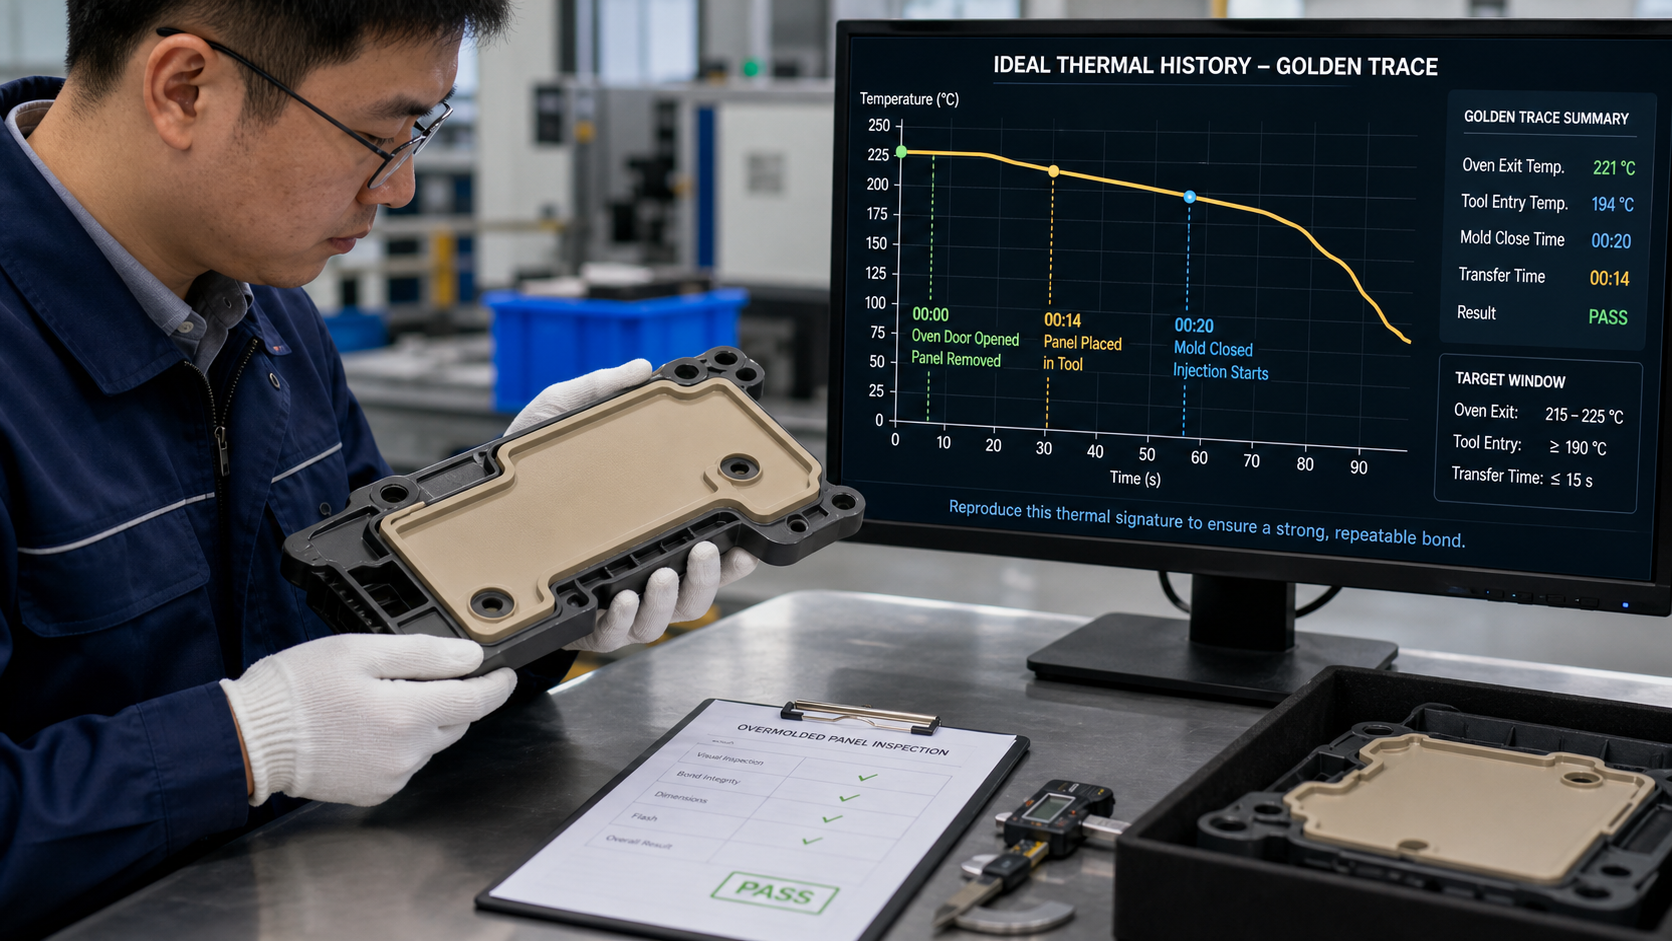
This "golden trace" is your recipe for success. It moves you away from relying on tribal knowledge or just a polymer's brand name. It becomes an evidence-based specification. Your process window is no longer just an oven setpoint; it's a dynamic profile. For example, your rule might become: "The panel must exit the oven between 215°C and 225°C, and it must enter the tool no lower than 190°C, with a transfer time under six seconds." Anyone on any shift can now follow this trace to produce a good part. It's important to remember that this trace is specific to the material grade you are using. A 30% glass-filled PEEK will have a different golden trace than an unfilled grade. This is why we treat process development as an evidence-based decision. By creating and following this thermal fingerprint, you make your process robust, repeatable, and far less prone to error.
Conclusion
Recording the panel’s true thermal history at oven exit and tool entry turns a difficult process into a repeatable, evidence-based manufacturing step, ensuring a strong and reliable bond.