Can an Unloaded Immersion Test Miss Stress Cracking?
Your polymer part passed its chemical test but failed in the field. This unexpected failure can halt production. The problem might be a hidden interaction the test simply missed.
Yes, an unloaded immersion test can completely miss environmental stress cracking (ESC). This failure mechanism requires both chemical exposure and mechanical stress to occur. Without applied strain during the test, the material may appear falsely resistant, leading to unexpected field failures in demanding applications.
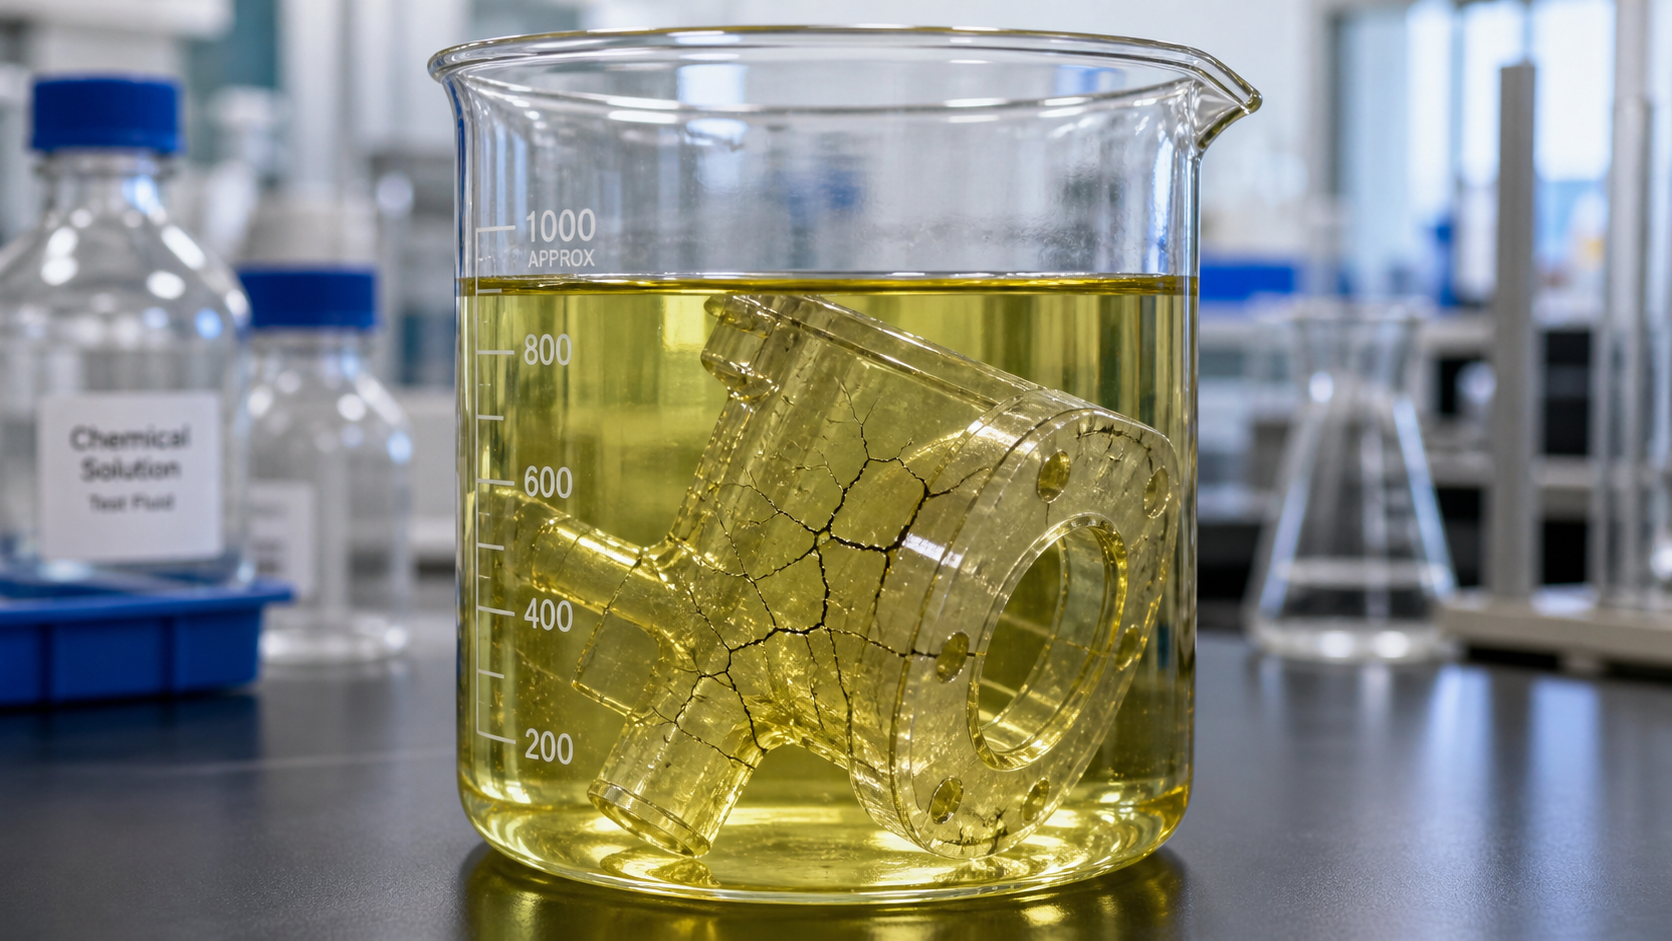
We often see field failures caused by overlooked interactions between chemicals and stress. A simple immersion test, where a sample just sits in a fluid, doesn't tell the whole story. It is crucial to understand how a part behaves under real-world conditions, where stress from assembly or operation is almost always present. We believe that examining test strain alongside chemical contact is essential for reliable component design. Let's look at why adding a load to your test can reveal risks that an unloaded test would hide.
Comparing Immersed Samples With and Without Applied Strain?
You trust your material data sheet, but your components are failing. Standard chemical resistance charts show your polymer is compatible. The missing piece is the mechanical stress from assembly.
Comparing immersed samples with and without strain is critical. The unloaded sample tests for simple chemical degradation, while the loaded sample reveals susceptibility to environmental stress cracking. This direct comparison makes your test design an evidence-based decision, not a guess based on the polymer's name.
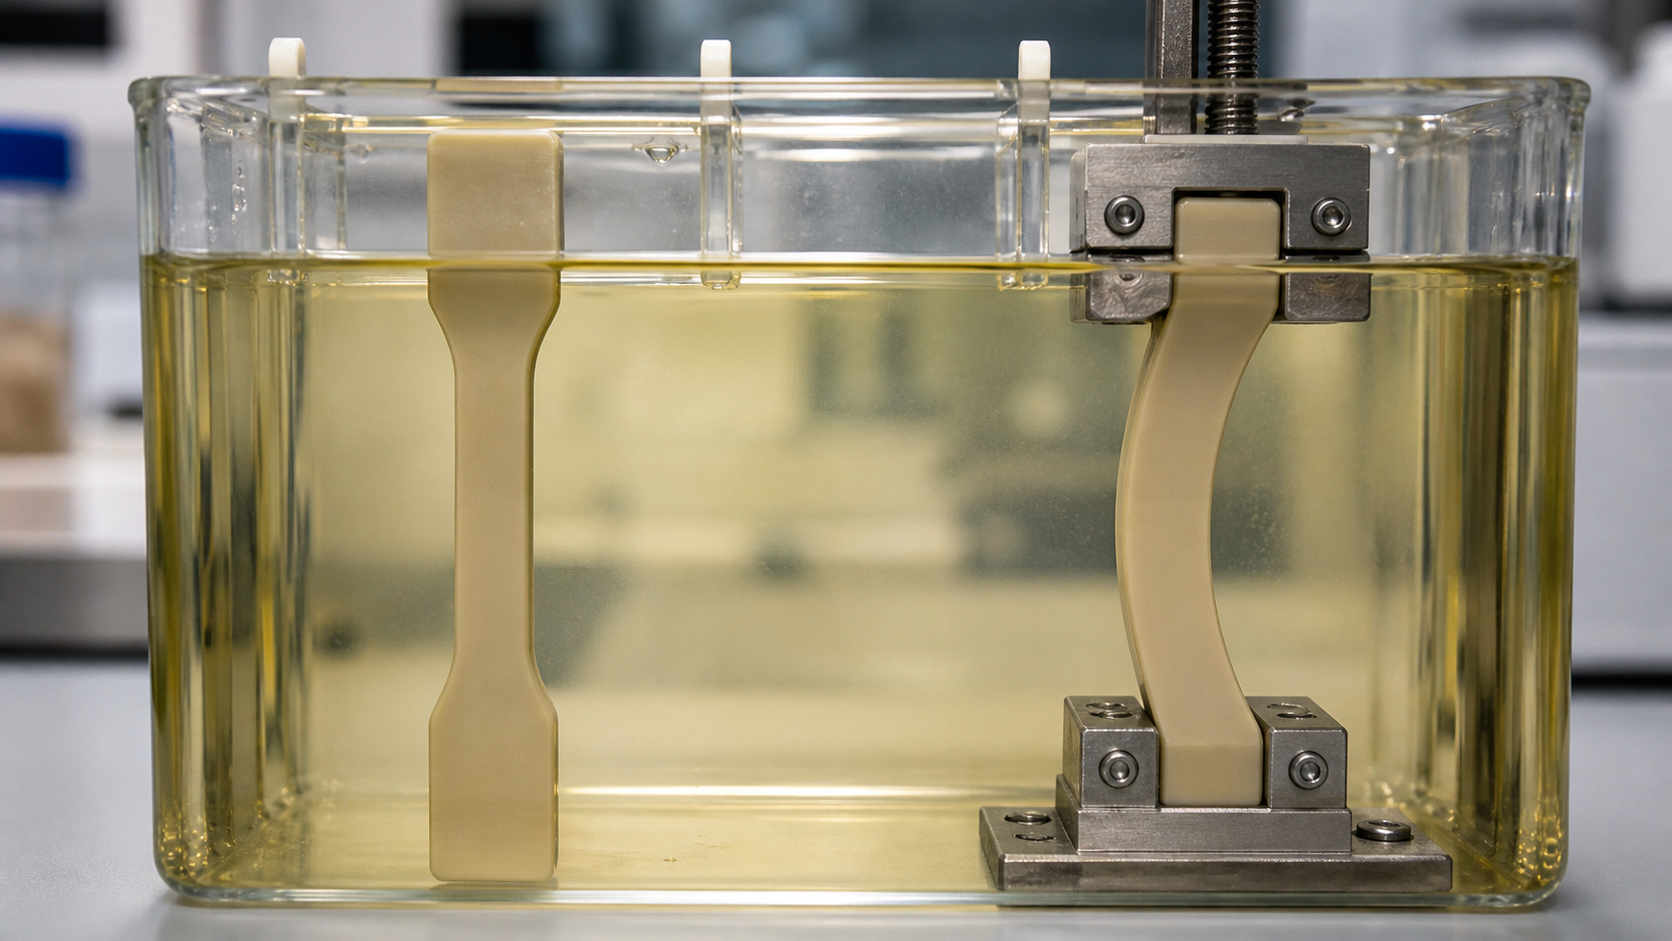
I remember a case where a customer's PPS component kept failing in a fluid-handling system. The chemical compatibility chart said it was perfectly fine with the specific chemical. But the part was bolted down tightly, creating a constant strain near the fastener. When we tested samples, the unstressed one looked perfect even after 1000 hours of immersion. However, the sample that was held in a fixture with a small, constant bend developed tiny surface cracks in just 24 hours. This proved that the failure wasn't from the chemical alone, but from the combination of chemical exposure and mechanical stress. We use this loaded-versus-unloaded comparison to make a clear, evidence-based decision for our clients. It is not about inventing new data; it is about using the right test method to see the real risk. We are careful to retain the original material grade, test conditions, and application limits to keep the results honest and relevant.
Key Differences in Test Outcomes
| Test Type | What It Measures | Potential Blind Spot |
|---|---|---|
| Unloaded Immersion | Chemical absorption, swelling, discoloration, or dissolution. It measures direct chemical attack. | Completely misses environmental stress cracking (ESC), as no mechanical stress is applied. |
| Loaded Immersion | Resistance to cracking when a chemical agent and mechanical stress are present together. | The applied stress level must be representative of the actual application to be meaningful. |
Choosing a Load Representative of the Assembly?
Your part is cracking around a screw hole. You know stress is the problem, but how much is too much? Guessing the test load can lead to over-engineering or, worse, failure.
To choose a representative load, analyze the sources of stress in your assembly. These include bolt torque, press-fits, thermal expansion mismatch, and external operational loads. Use calculations or finite element analysis (FEA) to estimate the strain in critical areas and apply a similar strain level to your test samples.
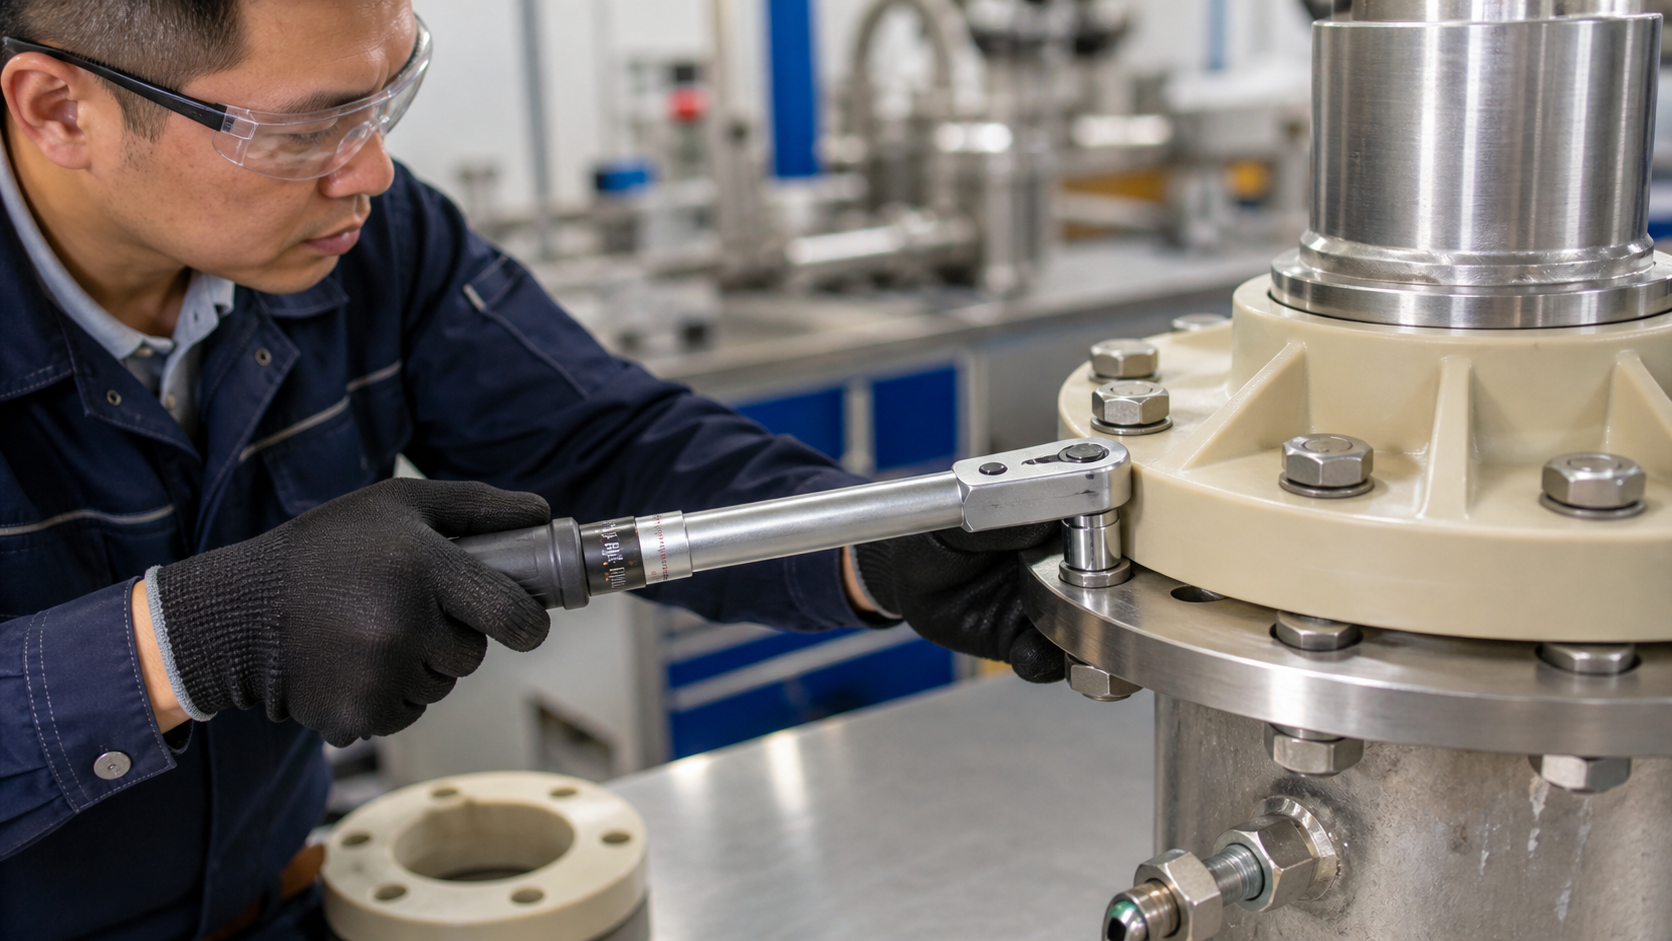
It is not enough to just apply any load to a test sample. The load must mean something in the context of the final product. I have seen tests where a sample is bent to an extreme 2% strain, but the actual part only ever sees 0.5% strain in service. The test might show a failure, but this result is not relevant to the application and could lead to unnecessarily expensive material choices. On the other hand, if a press-fit part has 1.5% residual strain, testing at only 0.5% is not challenging enough and could give you a false sense of security. You have to look at your real assembly. Is there a bolt being tightened? You can calculate the strain from that torque. Is it a snap-fit? The strain is highest during the assembly process. Is there a significant temperature change in service? The different thermal expansion rates of a polymer and a metal part bolted together can create huge internal stresses. Choosing the right load makes the test predictive, not just academic. It connects the lab result directly to the field performance you can expect.
Watching for Delayed Cracking During Exposure?
Your component looked perfect after a 24-hour chemical test. But weeks later in the field, it cracked. This delayed failure can be a mystery and become very costly to resolve.
Delayed cracking is a hallmark of environmental stress cracking. It is not an instant event. You must inspect samples periodically throughout the exposure duration, not just at the end. Cracking can take hours, days, or even weeks to start, even under constant load and chemical contact.
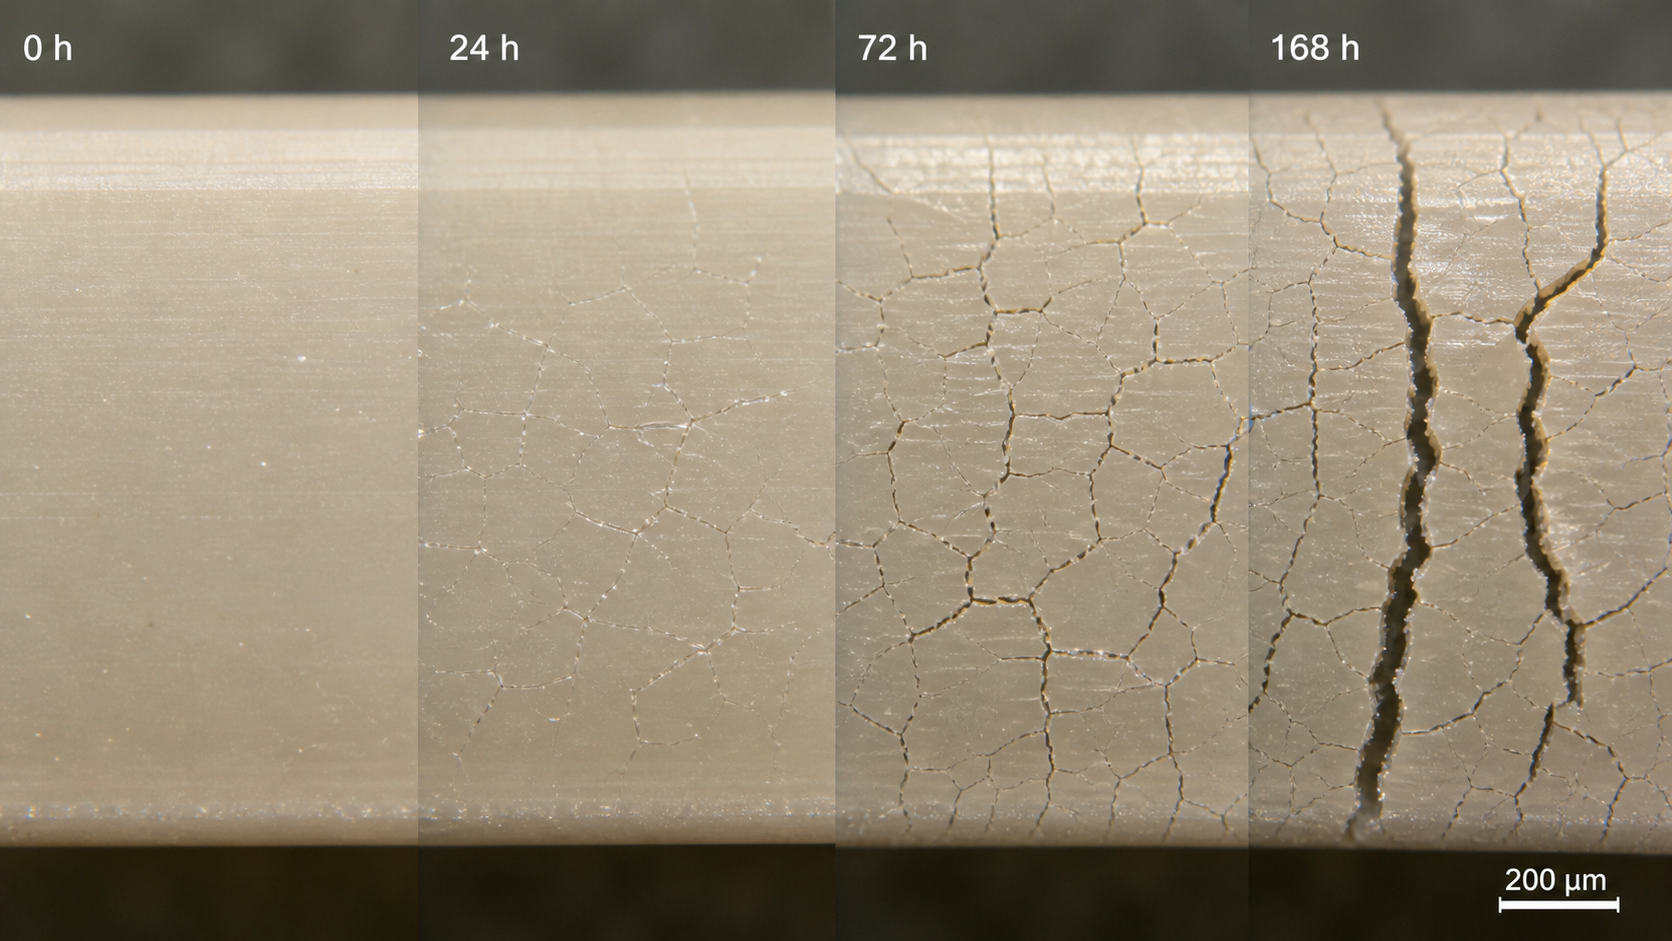
Stress cracking is a slow process. It often starts with tiny surface crazes, which are micro-voids that form under tension. The aggressive chemical then seeps into these crazes, weakening the material at the tip of the craze and allowing it to grow. Over time, these crazes connect and deepen until they become a full-blown crack. This process does not happen in five minutes. I once worked on a project involving a PEI component used in a medical device cleaning system. We set up a loaded test in the cleaning fluid, and after 48 hours, everything looked fine. The project manager was ready to sign off on the material. I insisted we keep watching. On day five, we saw the first signs of crazing when we looked under a microscope. By day ten, small but visible cracks had formed. Had we stopped the test early, a very expensive and critical piece of equipment would have failed in the field. Patience is key. You must check the samples regularly over a long period. A "pass" after a short test might just mean you have not waited long enough for the failure to show up.
Setting Test Conditions That Challenge the Relevant Mechanism?
You ran a loaded immersion test, but the part still failed in the field. The test conditions did not match the real world. A simple mismatch in temperature can invalidate all your results.
To challenge the relevant failure mechanism, your test conditions must mimic or accelerate the worst-case service environment. This includes the chemical concentration, temperature, and the type of stress (static or dynamic). Higher temperatures, for example, often accelerate chemical attack and polymer creep, making stress cracking more likely.
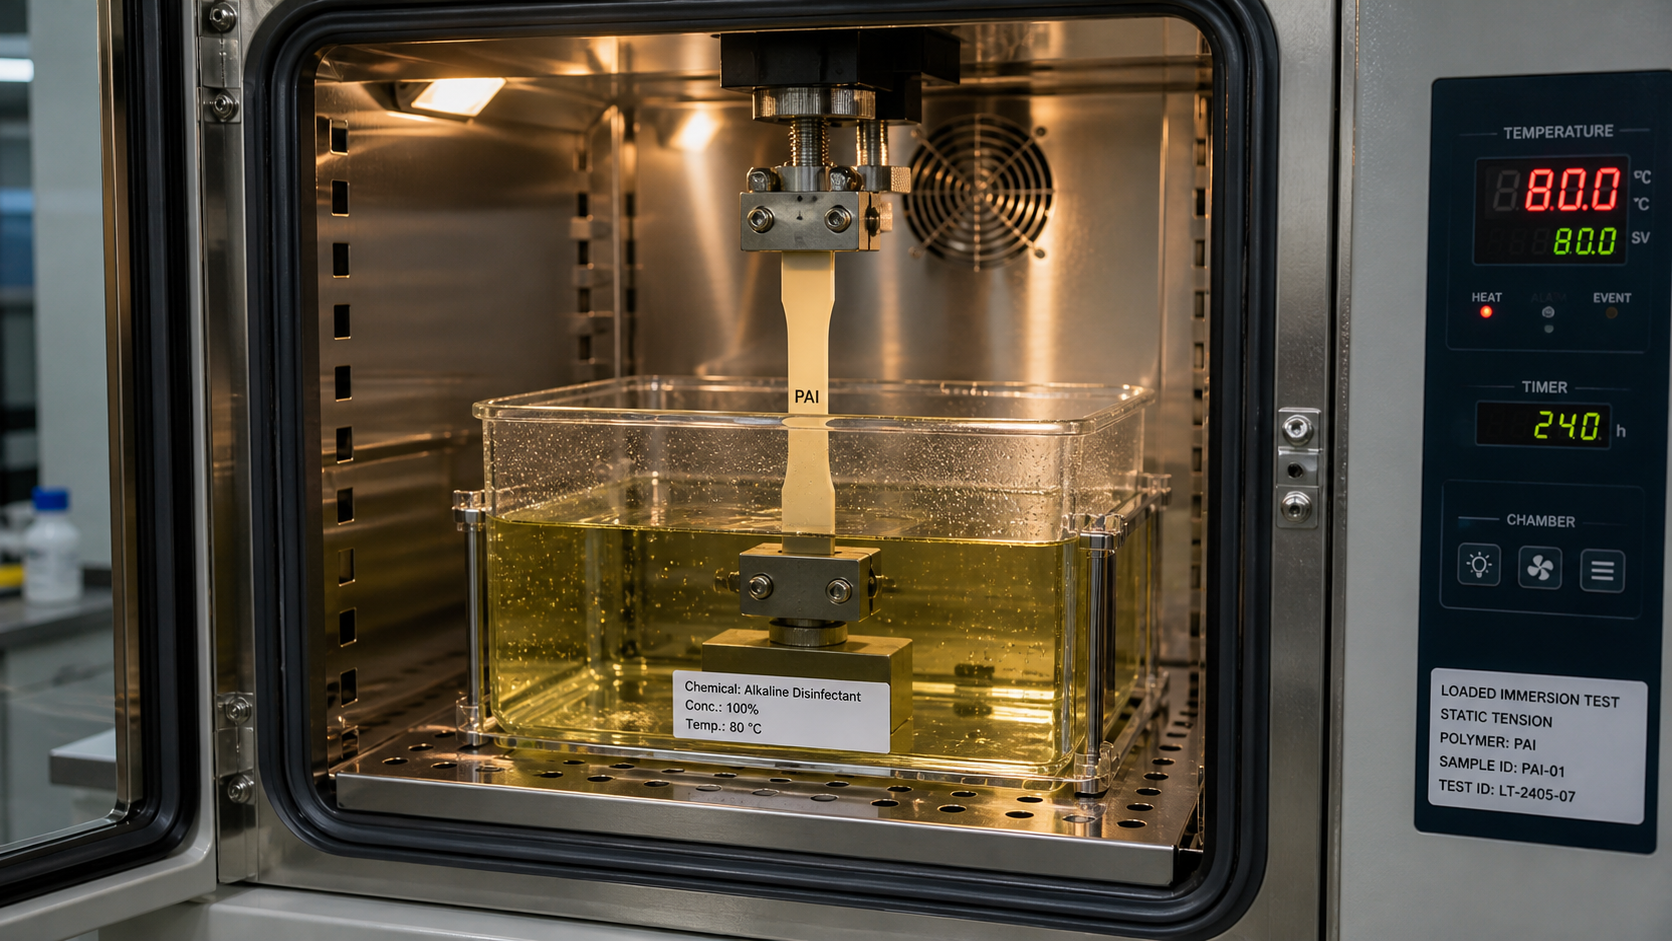
Every detail of the test setup matters. A client was having issues with a PPSU part that was part of a hot disinfectant system. Their internal test at room temperature showed no problems at all. However, the disinfectant was always used at 80°C. We re-ran the loaded test at 80°C, and the samples failed within hours. The higher temperature was the critical factor that had been missed. It made the polymer soften just enough to allow the chemical to penetrate the surface and attack the material much faster. You also have to consider the chemical concentration. Is it a 10% solution or 100% pure? And what about the type of load? A constant, static load from a bolt is very different from a cyclic load caused by vibration. Each of these factors—temperature, concentration, stress type—can be the key that unlocks the failure mechanism. Your test must be designed to challenge the specific combination of factors your part will see in its real job. A generic test gives a generic answer. A specific, well-designed test gives a useful one.
Conclusion
In summary, an unloaded immersion test is often not enough. To truly understand chemical resistance, you must test polymers with a representative mechanical load and watch for delayed effects.